Desktop GUI Quick Start Guide

Introduction
The veraPDF Consortium provides open source PDF/A and PDF/UA validation developed with the support of the PDF industry. The veraPDF Conformance Checker uses the veraPDF Java library, which provides the APIs and implementations for PDF/A and PDF/UA Validation, Policy Checking, Metadata Repair, and Reporting. The veraPDF Desktop Graphical User Interface (GUI) allows users to run the software on a desktop computer or workstation.
This Quick Start Guide explains some basic concepts relevant to the veraPDF Conformance Checker and helps you to get started with veraPDF Desktop GUI.
The veraPDF Desktop GUI overview
The veraPDF GUI provides the features of veraPDF Java Library in a desktop windows GUI. Users can configure their own validation and policy checking jobs by selecting:
- which combination of tasks to perform;
- PDF Documents to analyse;
- the PDF/A or PDF/UA part and conformance level to test for; and
- various task specific settings.
The software carries out the configured task and reports the results in both XML and HTML formats. The XML report is intended for consumption by automated processes while the HTML report is designed for human readability.
Using veraPDF Desktop GUI
The application installation folder contains the script that shall be executed to launch veraPDF Desktop GUI application. The script name depends on the platform:
- on Mac OSX and Unix systems:
verapdf-gui - on Windows systems:
verapdf-gui.bat
When the application is started the following screen is displayed:
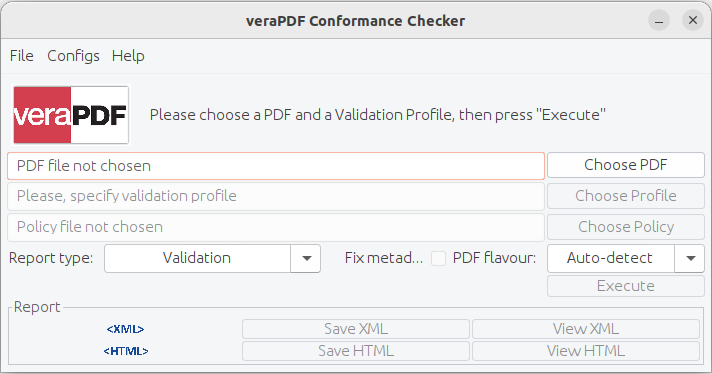
The interface is fairly simple, we describe the controls in the following sections.
Choose PDF
The user can select PDF file(s) for validation or feature reporting by drag&drop file(s) into PDF file not chosen area or by pushing button Choose PDF. User also can drag&drop or choose file(s) with any (even missing) extension, or a zip archive containing PDF documents, or a folder with multiple PDFs processed recusrsively. The Execute button is not enabled until any files or folders are selected.
Choose Profile button and Profile dropdown
The Choose Profile button and the dropdown immediately below it determine the validation processing. The Choose Profile button allows the user to load a custom Validation Profile from the file system or user can drag&drop a profile into Validation profile not chosen area. For most users the built in profiles packaged with the software will be sufficient. The dropdown below the button is used to control profile selection:
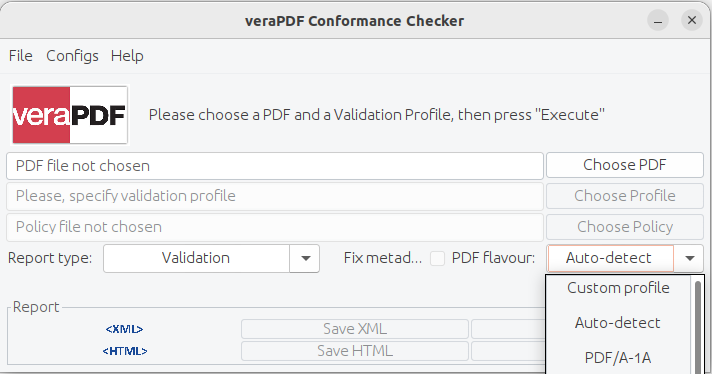
The options are as follows:
| Option | Description |
|---|---|
| Auto-detect | The veraPDF software will detect the PDF/A or PDF/UA flavour when parsing the file and use the appropriate profile. |
| PDF/A-1a | Use the PDF/A-1a validation profile, i.e. assume that the file is a PDF/A-1a. |
| PDF/A-1b | Use the PDF/A-1b validation profile, i.e. assume that the file is a PDF/A-1b. |
| PDF/A-2a | Use the PDF/A-2a validation profile, i.e. assume that the file is a PDF/A-2a. |
| PDF/A-2b | Use the PDF/A-2b validation profile, i.e. assume that the file is a PDF/A-2b. |
| PDF/A-2u | Use the PDF/A-2u validation profile, i.e. assume that the file is a PDF/A-2u. |
| PDF/A-3a | Use the PDF/A-3a validation profile, i.e. assume that the file is a PDF/A-3a. |
| PDF/A-3b | Use the PDF/A-3b validation profile, i.e. assume that the file is a PDF/A-3b. |
| PDF/A-3u | Use the PDF/A-3u validation profile, i.e. assume that the file is a PDF/A-3u. |
| PDF/A-4 | Use the PDF/A-4 validation profile, i.e. assume that the file is a PDF/A-4. |
| PDF/A-4e | Use the PDF/A-4e validation profile, i.e. assume that the file is a PDF/A-4e. |
| PDF/A-4f | Use the PDF/A-4f validation profile, i.e. assume that the file is a PDF/A-4f. |
| PDF/UA-1 | Use the PDF/UA-1 validation profile, i.e. assume that the file is a PDF/UA-1. |
| PDF/UA-2 | Use the PDF/UA-2 validation profile, i.e. assume that the file is a PDF/UA-2. |
| WTPDF 1.0 Accessibility | Use the WTPDF 1.0 Accessibility validation profile, i.e. assume that the file is a WTPDF 1.0 Accessibility. |
| WTPDF 1.0 Reuse | Use the WTPDF 1.0 Reuse validation profile, i.e. assume that the file is a WTPDF 1.0 Reuse. |
| Custom Profile | Enables the Choose Profile button allowing the user to load an external validation profile. |
Report Type dropdown, Choose Policy button, and Fix Metadata checkbox
These controls allow the user to select the processing functionality and the information included in the generated report:
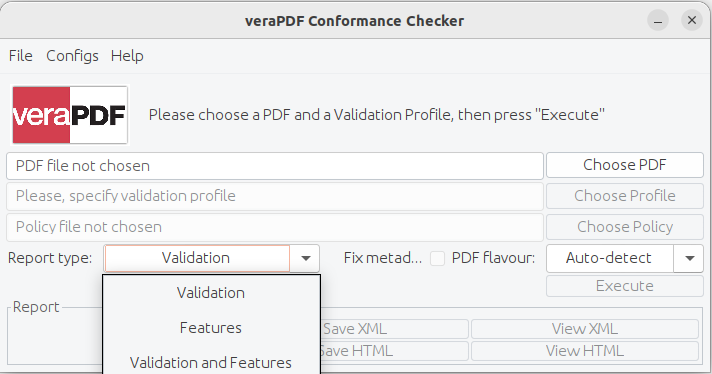
The available options are:
| Option | Description |
|---|---|
| Validation [default] | Only perform Validation and report the results, feature reporting is disabled. |
| Features | Only carry out feature reporting, don’t try to validate the PDF file. |
| Validation & Features | Both Validation and Features reporting are carried out and the results reported. |
| Policy | Perform a Policy check alongside validation and feature extraction. |
If Policy is selected the Choose Policy button is activated, the user can use this to load a policy schematron file or user can drag&drop policy file into Policy file not chosen area.
The Fix Metadata checkbox (enabled only in the Greenfield version) determines whether the software will attempt to amend the PDF document metadata to ensure it is compliant with the PDF/A or PDF/UA specification.
Execute button
This button is only enabled when a PDF file has been chosen. If you’ve chosen to use a custom validation profile from the dropdown then you must also select an external profile file. Once enabled and pressed the PDF file will be processed according to the selected options.
View Report buttons
Once processing is complete the reporting buttons will be enabled:
| Option | Description |
|---|---|
| Save XML | Saves the processing results as a machine parsable XML report. |
| Save HTML | Saves the processing results as a human friendly HTML report. |
| View XML | Opens the machine parsable report in the default XML viewer. |
| View HTML | Opens the human friendly report in the default HTML viewer. |
The XML report will contain Validation Report and PDF Features Report, depending on the chosen processing options. Currently the HTML report only includes the results Validation information.
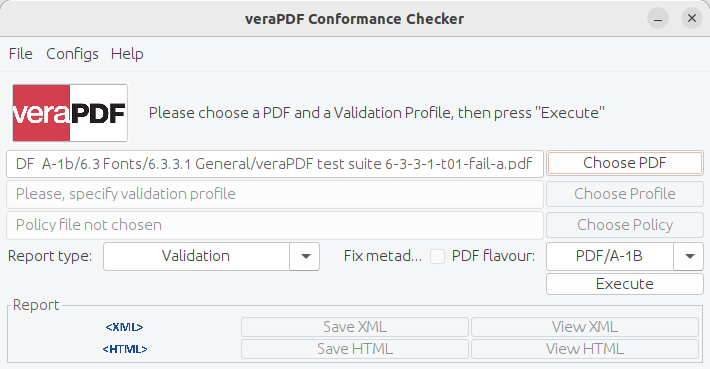
Once a PDF File is selected, and possibly a custom profile depending upon the dropdown, the Validate button becomes enabled.
The main window allows specifying the basic settings of the validation process: the type of the data included into the resulting Machine-readable Report and if automatic metadata fixing is enabled.
Advanced Settings
The additional Settings dialog allows the user to configure the advanced settings:

The advanced settings are described in the table below:
| Setting | Description |
|---|---|
| Include passed rules | If checked, the passed validation rules are included into the resulting Validation Report in addition to the failed rules. This setting is unchecked by default to reduce the size of the resulting Report. |
| Add logs to xml and html reports | Specifies, if the logs generated during processing will be added into the Report. |
| Add detailed errors to report | If checked, the detailed error message for every failed rule will be shown in the resulting Validation Report. |
| Halt validation after failed checks | Specifies the maximum number of failed checks to be performed for all rules in the Validation Profile. Validation is halted once the number of failed checks is reached in order to speed up validation. |
| Display failed checks for rule | Specifies the maximum number of failed checks to be reported for each rule from the Validation Profile. The specified value is used as the limit for the number of failed checks that shall be included into the resulting Report to reduce the size of the Report. |
| Save repaired files with prefix | Specifies the prefix that is added to the name of the original PDF document when saving it after automatic metadata fixing was performed. This setting is used only when Fix metadata option is enabled. |
| Save repaired files into the folder | Specifies the output folder for saving the PDF Documents after automatic metadata fixing was performed. Again this setting is relevant only when Fix metadata option is enabled. |
| Validation Profiles wiki root | Specifies the base URL of the veraPDF validation profiles wiki. This provides contextual information about validation issues. |
| Default flavour | Specifies built-in Validation Profile default flavour, e.g. 1b. This flavour will be applied if automatic flavour detection based on a file’s metadata doesn’t work. Possible Values: [PDF/A-1A, PDF/A-1B, PDF/A-2A, PDF/A-2B, PDF/A-2U, PDF/A-3A, PDF/A-3B, PDF/A-3U, PDF/A-4, PDF/A-4F, PDF/A-4E, PDF/UA-1, PDF/UA-2, WTPDF 1.0 Accessibility, WTPDF 1.0 Reuse]. |
| Logging level | Enables logs with level: OFF; SEVERE; WARNING, SEVERE (default); CONFIG, INFO, WARNING, SEVERE; ALL. |
Locating the configuration files
All settings are stored in the several XML configuration files located in a sub-directory called config below the veraPDF installation directory or in folder verapdf in the user directory. To find the location of the configuration files, use menu item Configs->Open config location:
Processing and Reporting
A Validation Profile describes the tests that shall be performed during the validation. These tests are represented by rules that define a certain restrictions on the PDF Document features. When validation is performed the restrictions from the rules are checked for the relevant objects from PDF Document. A check may either fail or pass. In case of large Documents the number of passed and failed checks may be big so the settings described above allow reducing the number of redundant checks and thus optimizing validation time and the size of resulting Report.
When all the required settings are specified the validation may be started by pressing the Execute button. During the processing the progress bar is displayed. After the validation is finished the resulting statement is shown as in the example image below:

It is possible to save or view the resulting XML or HTML reports by pressing the corresponding button.